Experiments·Transcript-backed
Permanent Magnet Experiments: Pulse Motor Lift with Magnets Underneath Rotor
Watch Papa Bale test permanent magnet lift on his pulse motor. Removing the stator, trying magnetic levitation discs, troubleshooting loads, and comparing setups with and without the bottom magnet array. Real bench results only.
Long-form · Full audio · Best on YouTube
Watch the complete video: Permanent Magnet Experiments: Pulse Motor Lift with Magnets Underneath Rotor
Watch the full long-form video on YouTube — that's where the full bench audio, runtime, and experiments live.
Preview embed · full runtime is better on YouTube
Prefer the full player? Better audio, runtime, and next-video queue on YouTube.
▶ Open full on YouTubeJump to the discussion · full video on YouTube
Hear it on the bench
Each link opens “Permanent Magnet Experiments: Pulse Motor Lift with Magnets Underneath Rotor” on YouTube at the first time that topic comes up in the captions. Stay on YouTube for the complete runtime.
See it on the bench · full runtime on YouTube
What to watch for
- ▸Removing the permanent magnet stator lets the rotor coast noticeably longer with almost no drag.
- ▸A bottom disc with two rings of magnets creates measurable lift, raising the upper rotor assembly by the thickness of the flange.
- ▸Taking one row of magnets off the levitation disc lowers the rotor but introduces more wobble on the pegboard shaft mount.
- ▸Running without any bottom disc increases perceived load and shortens spin-down time even though center of gravity drops.
- ▸The reed switch and passing magnets produce an audible ticking that can be confused with mechanical load.
- ▸Gluing magnets or switching back to stacked bearings are the next logical fixes for rattle and friction.
Watch the full long-form video on YouTube — that's where the full bench audio, runtime, and experiments live.
Experiment notes (read while you watch)
Notes support the video — for the full-length run with complete bench audio, stay on YouTube.
I took the permanent magnet stator off my six-coil reed switch pulse motor and started testing lift using a disc loaded with neodymium magnets underneath the rotor. We compare coasting times, listen for loads, remove rows of magnets, and try running without the levitation disc entirely. Bearings, friction, wobble, and unexpected slowdowns all get measured on the bench.
Key takeaways
- Removing the permanent magnet stator lets the rotor coast noticeably longer with almost no drag.
- A bottom disc with two rings of magnets creates measurable lift, raising the upper rotor assembly by the thickness of the flange.
- Taking one row of magnets off the levitation disc lowers the rotor but introduces more wobble on the pegboard shaft mount.
- Running without any bottom disc increases perceived load and shortens spin-down time even though center of gravity drops.
- The reed switch and passing magnets produce an audible ticking that can be confused with mechanical load.
- Gluing magnets or switching back to stacked bearings are the next logical fixes for rattle and friction.
In this bench session I stripped the permanent magnet stator and started playing with lift using magnets underneath the rotor. The six-coil drive circuit still fires in the same lightning-fast sequence but now the rotor coasts way longer with nothing fighting it. I spun it by hand, let it wind down for over a minute, and the bearings sounded smooth. The only drag I could hear was the light ticking from the reed switch catching each magnet node.
The real experiment started when I slid a six-disc rotor loaded with neodymium magnets underneath the main rotor. The bottom disc is literally pulling the top one upward. You can see the gap above the flange — that whole space is being lifted by the opposing permanent magnet fields. I measured it by eye against the disintegrating pegboard and it looked like almost 3/16 of an inch of lift on one side.
When I pulled one entire ring of magnets off the bottom disc the rotor dropped lower on the shaft. That reduced the wobble a bit but the table still shook at speed. The sound changed too — a louder rattle that kept going even after I cut power. I thought it was a load on the circuit until I realized the magnets were just loose and vibrating against the disc.
Running completely without the bottom disc felt heavier. Spin-up was okay but coast-down seemed shorter and the whole thing vibrated less because the center of gravity dropped. I kept hunting for crossed wires or a short but everything looked correct. The conclusion I kept coming back to: the levitation disc actually gave me longer, smoother runs even though it added a little magnetic friction.
Related on this site
- Pulse Motor Rotor Design: Magnets, Materials and Balance — Directly supports discussion of magnet placement, disc stacking, and balance issues encountered during the lift experiments.
- Understanding Magnetic Friction in Pulse Motors — Compares the magnetic friction heard in this test with the full dedicated friction video.
- I Finally Got My Pulse Motor Running (Reed Switch) — Shows the same reed switch pulse motor in an earlier successful run before stator removal and levitation tests.
- Pulse Motor vs Bedini Motor: What's the Difference? — Helps viewers understand how this stator-less configuration still relates to classic Bedini SSG designs.
---
*Generated from video transcript (hash `556018d56714…`).*
Full transcript (11,759 chars · en)
hey everybody what's up this is Papa Bale welcome to the channel uh this looking at the pulse motor I've removed the permanent magnet stator and we're not dealing with just two that's actually six coil Drive circuit and this is how it works it goes here there there then here there there okay that's the order although it happens at the speed of light that's the order in which it happens in I know that uh and then you know having everything go the right direction so we give it a little just a little tiny and it coasts a lot better without any permanent magnet going in there wow that is so awesome all right we're going to cut it back all the way down all right and now we're going to let it Coast out this is kind of just to see whether or not there's I mean last time when there when I said there was a load it was this green wire was hanging over these red wires right here and that was hooking the two circuits together at a different point they were hooked together at two points so it did act as a load because that was the circuit inside a circuit um but I as soon as I straighten that out and uncross the wires uh it it works works just fine um now of course I was even thinking about taking the rotor off and doing the magnets over again just to see if we could get the the rattling on the table reduced even further it used to be really bad um and you know didn't take much speed at all to get it to shake now the bearings I believe are good right now bearings are good there's a bearing on the top disc and a bearing on the bottom disc there are six discs 10-in discs glued together so there's a space in between the two bearings that is virtually like empty so there's no friction there only the friction on the two bearings and the reason I put six together is cu it's 316 I believe of an inch per disc you put six of them together you got 1816 which is 1 and 216 which is more than an inch which is just about what I needed 1.26 in so there might be some overlap or some overhang all right wow that's pretty pretty cool what was that about a minute and a half and I'm thinking it's because of the minor friction of this disc underneath here I mean in between each magnet node there is uh some friction you can hear it sometimes when the motor's running it sound like a that's the read switch and these magnets but you know I found that it's less friction doing it that way than stacking up bearings on the on the on the shaft and just resting them on the bearings see I've done it both ways there's the bearings to rest them on and yeah so we'll get a nice little under Carriage here and see if we can zoom in on that all right so there's the flange at the bottom and everything above that is just pull so it's literally all that space right there is being is is lifted the bottom disc is lifting the top disc that much now if I took a row of magnets off the bottom you notice how there's two there I bet you would would fit kind of right in line with most of those coils see because you can see that it's too high right here but over on the other side is kind of just just right and that's because the the peg board you see how it's like all disintegrated right here I think in this hole where the shaft is going through uh and is clamped in there was a bit of WD40 that was used and it soaked the hole I'm not sure if I switched it yet I'm pretty sure I did because that's that's a sturdy shaft you know I think maybe even if it got a little bit yeah you know what I'll do I'll change I'll take one row magnets off get it a little bit lower on the shaft so that way it won't wobble around as much and we'll see what happens all right I'll be right back peace out all right so see Daisy there it is taking one roll of the magnets off and stack now we're going to put the the rotor on okay be right back all right we we put it back on we removed the stack we're going to give it a little little whirl making sure nothing's knocking that should shore it up a little bit I mean it's going to shake the table regardless still moves pretty good here we go what's going on here yeah that's pretty loud see now here's the load I was talking about oh it sounds like it's the load you hear that should not be slowing down that [Applause] fast [Applause] yeah I don't know definitely feels different now I think it's just the magnets rattling it really does sound like that reason you know it's that because when you cut the power it's all the way cut and it's still making the noise so I could either glue the magnets down or could remove the disc entirely and put the bearings back in just sling down pretty fast definitely it feels like there's a load on that one all right so I'm going to remove the disc and put the bearings back on okay so I've removed the disc underneath completely there still appears to be some kind of load [Music] um just looking for any wires that might be connected incorrectly oh it looks good cuz it's still it feels like there's a load on here even more so without the disc and with okay this is how it runs without the disc I don't know what do you think I think it's a little slower but it's moving around a lot less because the center of gravity is a little lower but yeah it's still moving clipping at a pretty good rate you'll see it slow down like super duper fast it's like H I wonder why it's doing that now all of a sudden there's the load I'm talking about I don't know why it's doing that maybe it's just because there's more friction than there was with the disc I don't know but all I know is that I could get it to spin faster longer using that levitation disc so I got three spots open or I could up the amount of magnets on the rotor to 12 and have completely different setup but uh as for this setup I got three spots open actually you can put a coil anywhere to generate electricity you can put like the generator coil like right there and it would be cool you can put one right here you can put one here put three of them here actually you put three of them in each one of these spaces two in like that space right there you can have it staggered a little bit you could have one right there and you could have one backed up right there you could do lots of different things but I just try and keep it simple so that I can understand what's going on on and other people can see it too yeah it's just looking at it it's a little a little lopsided it's better now than it was before though but see now this one's almost right it's a little low see and then this one is like really low now yeah and you can see where the magnets are off like that's right this is almost right so if you move this magnet over a little bit it'll be right this one's almost right these two are way off and that one's kind of way off too if we move it like that then these two are off and the other ones are kind of on but yeah I mean some of the magnets can be moved to make this operate more [Music] efficiently all right so I'm going to go think about what I want to do for the three spots and I'll be back in one second all right so what I decided to do is do two experiments with uh just a single Drive circuit with nine coils but like one system after the other they're all going to be connected via diode to one another we're going to have try to have as much you know back flow as possible I know that it's like just part of it but we're going to use diodes we're going to use a capacitor this big thing right here we're going use that um and we're going to charge the capacitor with the power supply that makes sense um I mean we could get really creative and we could use these coils the charge the capacitor but it'll be the same going in as it is coming out so I don't know um like what we'll have is a diode going from this blue clip out so if I could yeah I got one right right here so from the blue clip out and then we'll clip two clips to the negative side one going to this coil and one going to the capacitor now that particular diode is a 3 amp 1000 volt capacitor and since we're we're only dealing with like uh very small I mean not just enough to be careful with but Max here is 25 volts and 20 amps but I never never seen more than 3.5 amps really I've seen four or five once but everything kind of blew out then and cuz the stuff that I'm using here is meant for like shop class and whatnot I mean there really that's not exactly what I mean this is not not industrial strength stuff I mean the multimeter might be industrial but I doubt it um you know what I'm saying it's like yeah it is what it is but I like it and I like getting into using the diodes and having it I know kind of change the direction of things so we split it there and we run it to the capacitor then we have another [Music] diode um that goes to the end of that one right there so we'll put an extra one in there we'll put a dial down the end of that and we'll hook the yellow one up to the diode and then it'll circle around to this one same thing kind around right here and then this this white one instead of hooking to the read switch I'm going to hook it into the next coil over here and I'm thinking we're going to start with cores we're going to have some cores in there start and and what I'm really thinking about right now is where we're going to put the other end of the the capacitor where we're going to hook that in do we just want it on the third circuit uh I'm not sure but you know yeah we'll probably just do it in a third circuit or we'll have it all be one circuit and we'll just have it feed into the beginning here this blue one is the beginning I mean after you get through all this Jazz over here this is where it starts with the coils right here where you make the connectivity between the power supply and the coils it's right there so if we do one it would be a s 8 n and it would end back there so that that coil then would be hooked to the re switch which is over here oh since this is the first one and we're going like this we'll put the first one here second one there and the third one here so that means this white cord is going to have to creep over to here yeah that that works it actually makes more sense to have it go one two three right and then the second experiment if we even get around to that right away will be to take the cores out and just use the larger size coils see what we can make out of that 22,000 100 volt so 22,000 micro yeah that's going to be fun hopefully we could even have both the ends of each one of these so we would actually want to have the capacitor over here and the end the end and the end we could all hook to each point of that actually we're only going to hook two of that two to that I don't know actually could hook all three to that and have the one come out uh to this point have the see the negative stripe this gold Stripe Right There have that end come out to right here CU they're all going to be connected to each other and then via diode we're connecting everything now via diode just to try to Channel or guide or whatever they do prevent back flow I don't know exactly but they're directional so I'm going to use them yeah all right so I think I don't know if we can get it to run for I don't know how bit how good the capacitors for if it's charged up I don't know how to tell all that stuff wow there was a lot of tug on that so I mean naturally we could even have them to be generator coils it's going to slow it down I think a tremendous amount I'm just getting gauge here this is without the levitation disc super cool but it's going to slow down apparently very quickly it's probably because of the bearing fiction all right I'm going to take it easy for a minute thanks everybody peace out have a good night please subscribe bye now
Keep watching · longer sessions
More long-form bench runs
Queue up the next long-form bench run on YouTube — longer sessions keep the workshop free for everyone.
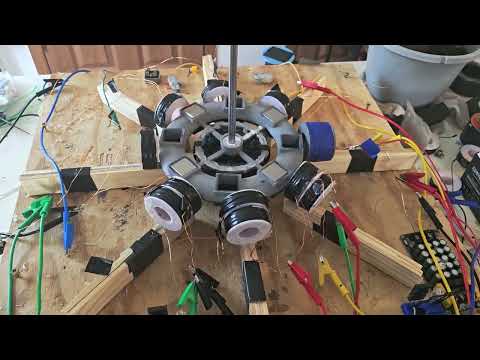 Long-form
2 circuits running a third room still for some growth/expansion.
Papa Bale here with a messy bench update.
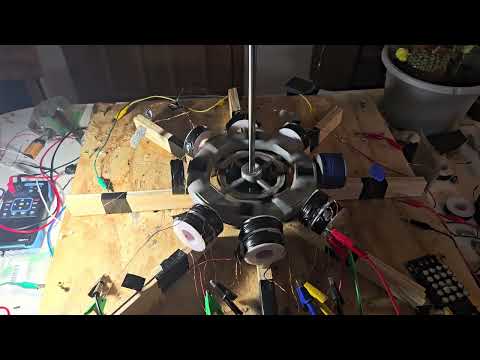 Long-form
M.P.H.'s pulse motor labs EP:2 Skin deep
I fire up two circuits at once, chase meter spikes, and retell the day a three magnet rotor one literally exploded at speed.
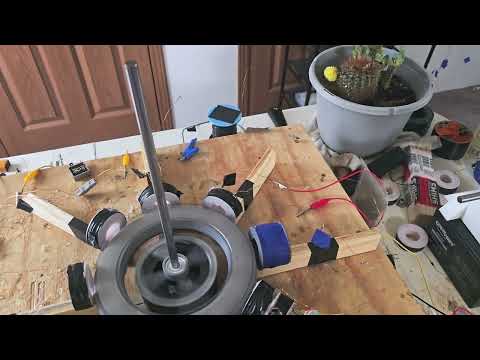 Long-form
Amp Funnel Coil: Pulse Motor Labs EP:1
Eight-magnet eight-coil pulse motor lab — amp funnel coil wiring, pickup coils, and give-and-take battery measurements.
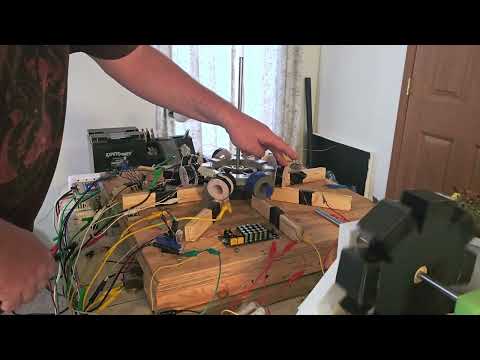 Long-form
MPH pulse motor lab
Real bench time with motor rotor magnets on a pulse motor rotor.
One path · free first
Watch free → subscribe → optional membership
Notes stay free. The full experiment lives on YouTube. Membership is optional when you want Discord and exclusives — not required to learn.
- 2
Subscribe free + turn on alerts
Hit Subscribe, then the 🔔 bell so you catch the next experiment.
Subscribe free + 🔔 - 3
Optional: join for $2.99/mo
Members-only videos, Discord, and live shoutouts — cancel anytime.
Join $2.99/mo
Longer sessions · ad-supported free library
Not done yet? Queue the next long-form run
Queue up the next long-form bench run on YouTube — longer sessions keep the workshop free for everyone.
- 1▶ Watch full on YouTube
Start: Shocking Truth About Pulse Motors
Notes & transcript on site - 2▶ Watch full on YouTube
M.P.H's pulse motor labs Ep:3 Sandbox
Notes & transcript on site - 3▶ Watch full on YouTube
4 parallel drive coils pulse motor generator 25x with 2.08v .7 amps in 55v 1 amp out
Notes & transcript on site - 4▶ Watch full on YouTube
2 circuits running a third room still for some growth/expansion.
Notes & transcript on site