Experiments·
MPH Pulse Motor Lab
Watch me spin a pulse motor using motor rotor magnets on a balanced rotor. From 3 volts and 120mA to 9V tests, induction coil readings, Bedini hookup lessons, and what actually worked on the bench.
Long-form · Full audio · Best on YouTube
Watch the complete video: MPH Pulse Motor Lab
Watch the full long-form video on YouTube — that's where the full bench audio, runtime, and experiments live.
See it on the bench · full runtime on YouTube
What to watch for
- ▸Three motor rotor magnets on the rotor deliver strong punches to the series-wired drive coils even at 3 volts and 120-130 mA.
- ▸An induction coil placed under the drive coil picked up 4.1 AC volts at 3 V input and climbed to 28-30 volts when raised to 9 V / 1 A.
- ▸Correct Bedini hookup requires connecting the charge battery negative directly to the primary battery negative for the radiant spike to appear.
- ▸The rotor is well balanced with good bearings; magnets stay in place at speed and flashing cap-bank LEDs show energy shuttling between stages.
- ▸Drive coils (16 AWG front three plus 20 AWG) are run in series; adding more coils may be needed to handle higher current draw.
- ▸Weak magnet-induced voltage is visible but the main induction comes from the drive-coil field imprinting on the pickup coil below.
Watch the full long-form video on YouTube — that's where the full bench audio, runtime, and experiments live.
Experiment notes
Papa Bale gets a pulse motor spinning with three motor rotor magnets, tests low-voltage drive coils, measures induction from a pickup coil underneath, and finally nails the correct Bedini-style common-ground hookup after months of trial and error.
Key takeaways
- Three motor rotor magnets on the rotor deliver strong punches to the series-wired drive coils even at 3 volts and 120-130 mA.
- An induction coil placed under the drive coil picked up 4.1 AC volts at 3 V input and climbed to 28-30 volts when raised to 9 V / 1 A.
- Correct Bedini hookup requires connecting the charge battery negative directly to the primary battery negative for the radiant spike to appear.
- The rotor is well balanced with good bearings; magnets stay in place at speed and flashing cap-bank LEDs show energy shuttling between stages.
- Drive coils (16 AWG front three plus 20 AWG) are run in series; adding more coils may be needed to handle higher current draw.
- Weak magnet-induced voltage is visible but the main induction comes from the drive-coil field imprinting on the pickup coil below.
In this bench session I finally got the pulse motor running cleanly with motor rotor magnets. The rotor holds three magnets spaced 120 degrees. At just 3 volts and about 120 mA the three drive coils fire in series and the rotor takes off smoothly. I propped an induction coil right underneath the main drive coil and watched the multimeter climb to 4.1 AC volts from simple proximity. When I bumped the supply to 9 volts the reading jumped to 26–30 volts while current sat around 1.03–1.15 A. The bearings are good and the rotor stays balanced, so the magnets don’t fly off. I also spent time sorting out the Bedini common-ground connection that had been tripping me up for months. Once the charge-battery negative ties straight to the primary-battery negative the spikes appear and the cap bank starts flashing nicely. It’s messy, it’s real, and it spins.
Related on this site
- Pulse Motor Rotor Design: Magnets, Materials and Balance — Directly matches the three-magnet rotor discussion and balance observations from the bench.
- Bedini Motor & SSG Circuit Guide (Beginner Bedini Explained) — The video focuses on finally getting the correct Bedini common-ground hookup after months of mistakes.
- Understanding Back EMF in Pulse Motors — Explains the negative spike that only appeared after fixing the battery negative connection.
- Best Neodymium Magnets for Pulse Motor Rotors — The motor rotor magnets used are strong neodymium type; section covers their performance at low voltage.
- Can a Pulse Motor Charge Batteries? What Experiments Show — Video demonstrates small but measurable charging once the Bedini wiring is correct.
- How to Maximize RPM on Your Pulse Motor — Mentions the need for better timing and additional coils to push speed while controlling current.
---
*Generated from video transcript (hash `ca861ae2550c…`).*
Full transcript
Yo, what's up people? It's Papa Bell aka M PH. I'm coming at you. They're split personality here. Uh, no, actually it's just a name change. And I think both names are good and both names are me or have been me throughout my life. So, I think we're going to go with M PH because that's real. Speaking of real, we've done Badini proper with the primary and the charge battery. We got great spikes. We were we were charging at least a tenth if not two a hundredth if not two 100s like every second. It was it was rather rapid and uh I think we we nailed it. So you've got the primary then that has the connection to the breadboard. Okay. And And that that negative connection you just connect a wire to the other battery negative and that's what I have been failing to do this whole time and then put the bedini on the you know the positive side and you connect do a common ground you know so like your primary is your common ground and you connect your charge battery to your primary. Um just the negative though and then you know there's so many other ways that I've been doing it and it's like uh you take that negative connection from the charge battery and instead of connecting it to the primary you connect it back to the emitter. It works, but you don't get the the negative spike. I guess you don't get the radiant spike. You got to hook it up that one way with the the primary uh negative in parallel with the or it doesn't it's going either way. It's just one connection. So, it's just connecting the negative to the negative. And there you go. Every other connection the same as the schematic I have except that one connection. And if it's there, I I couldn't read it. I can barely read schematics. So, you know, I did the best I could. But I feel good like I know it now. And it's it's been a freaking long time. So it's long time coming. All right. Now we got the the power supply running. That's 3 volts in and 120 milliamps. These three coils up front, uh, this is 16 gauge and these two are 20 gauge and they're all hooked up in series. So, as three magnets roll around here, I don't I don't know how, but what I did the rotation, but like when there's three magnets lined up here, they're all going to get hit for a pretty strong punch and get sent out sent along. This is 3 volts. So, I I think that's pretty good. Now, let me see if we can get this going at 3 volts. Okay. Now, I've got a big indu like uh induction coil underneath propping up the drive coil for this pulse motor in the corner here. And those two ends are hooked up to this multimeter. And we are getting currently four.1 AC volts of induction off of that coil down there just from it being underneath the drive coil. Because I know that isn't going fast enough to push the magnetic field beyond the whole drive coil. It's just it's not going fast enough to do that. So, what what's going on is is that uh the you know the electricity going through the coil drive coil is leaving an imprint on the induction coil below it. Just from proximity we're getting 4.3 volts. with 3 volts in and 130 milliamps. All right, I'm going to jack it up to 9 volts. Something that makes sense. Now we're at 25, 26, 27, 28, 28 induction volts. And that's with nine volts in and one uh one amp.3.03 1.03 uh 1.15 amps. I'm going to cut it. I just wanted to show you that when this even when I run the batteries because I was running it at 12 or not even 129 but the amps were revving up. I may have to hook a few more of these coils into the drive cuz that I believe it's 26 from here on out. This might be 24 but then this is 26. One of these is 26. So, the bottom line is going to be 26 if I extend it for current. Um, I think it's still going to be above 300 milliamps. Uh, I got to hook up my other multimeter to, you know, uh, figure out the amperage that's being generated. This This one isn't going to tell me. It's way too sporadic the reading. It's all right. And this is what I, you know, I don't know how to read amps. Um, I have one meter that might be able to do it like on its own and then the the other way like with the clamp and stuff. I don't what I No, thank you. I wish there was more like an automatic way to do that. And I think I got it with my uh my other multimeter. It's a threein one like oscilloscope. Multimeter signal generator. I want to do some signal generator stuff with this. So, I don't know, man. Maybe I should break that out of a closet over here. I just I'm I'm thrilled that we're getting 30 volts off of that coil from just from where it's at. That is so cool. And you're getting a little bit from the magnets. It's very weak probably, you know, uh because of how fast it gets to go. It's not on there very good. I mean, the only reason that it hasn't fallen off yet is because it is very balanced and the bearings are good. [clears throat] You can see the If you can see the lights on the cat bank, they're flashing very quickly. See? So, this one fills it up and this one takes from the cap bank. And it's a awesome, you know, synergistic uh god, what's that? Uh, not parasitic, but uh, I don't know. I'll figure it out later. Symbiotic. That's it. Now, I wonder if there's some way that I could sneak the power coming off this back into this system and maybe they could act as a break for each other, you know, like slow each other down. This one slows down pretty good. This one over here, not so much. Um, this one's not really slowing down right now. I don't know what the deal is, but uh, yeah, it's that's pretty cool, though. Me, I like things that spin. So, keep going. For all I care, I care that it works. No. I want to reiterate what's going on here. We've we've got these three drive coils and these two induction coils are in play right now. The ones that are behind these three aren't in play and these three are not working right now. So, it's just this one, two, three, four, five. Now, there's like uh if I hope I'm not botching this, but that the BMF connection for all three coils goes through the breadboard off off the collector. Okay. So, you put a diode in a collector slot and you clip the other end of a diode to where did I put it? Right. This it's going into the positive end of the cap bank here. So that that's where you would put on the positive end of the charge batteries the connection I'm talking about right now. Now there's no negative spike because we're not using batteries. However, it still functions except for the charging purposes as though you didn't need it at all. And that that's I'm not saying that's a that's a fact. I'm not saying that. If you're charging battery, this is a good way to do it cuz it's nice and quick. I mean, it's just keeps and depending on how low it is, this is how fast it goes up. Once this gets to the top, it like mellows out. Um, and that's because the battery should be relatively similar in the amount that they have in them. And it should really be right around 1290. 1290 1270 right in there. And that's the voltage for each battery, primary and charge battery. And that way, um, you get the smoothest charging. If it's really, really low, it's going to go up really, really fast, just like any other method of charging. Except with the negative spike, you know, I I think it's it's a little bit faster, a little bit more powerful. And you got to realize that some of the methods you would use to charge a battery, it's not going to take and it takes forever. And I mean, keep experimenting. That's what I suggest. You'll bump into a method or a way that that is, you know, solid. And that's that's important. It's important that it's that it's a solid method. And I mean, literally, most of these charge methods um revert right back to where you started. Um you know, and that's I think believe where the resistance comes in, uh potentiometer and things of that nature. um really help you, you know, zero in on, you know, the radiant spike. This is 4 420 420 volts. and 200 milliamps. So, we get for virtually double the amount of voltage and induction. But I I'd see I don't know about the amps. Yeah. See, I moved it over to the 10A slot and we get no reading. Virtually everything says zero. I know that's not right or this this wouldn't be happening. But it is all over the place and a lot of the numbers are negative numbers. >> So, you know, the amps are still a mystery. Uh, kind of. I could hook up my other meter, but that's for another video. I'm thinking 420 volts, 340 milliamps. So cool. And it looks like the secondary might have the power to far surpass the primary in speed. I think it's because the coil is probably so much bigger. But, uh, yeah, there's lots of benefits to having larger coils. It's just that, uh, there's not always room, but, uh, yeah, there's not always the copper around to do it either. So, I'm thinking Yeah, just roll with what I got right now. >> All right, peace out. Have a good night. Bye now.
Keep watching · longer sessions
More long-form bench runs
Queue up the next long-form bench run on YouTube — longer sessions keep the workshop free for everyone.
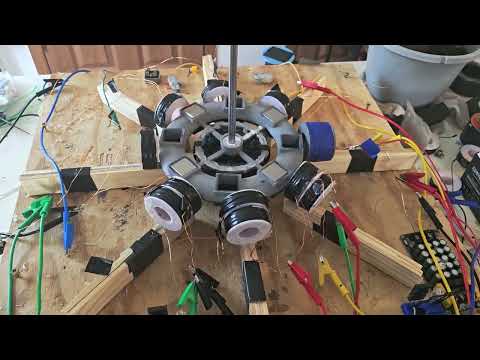 Long-form
2 circuits running a third room still for some growth/expansion.
Papa Bale here with a messy bench update.
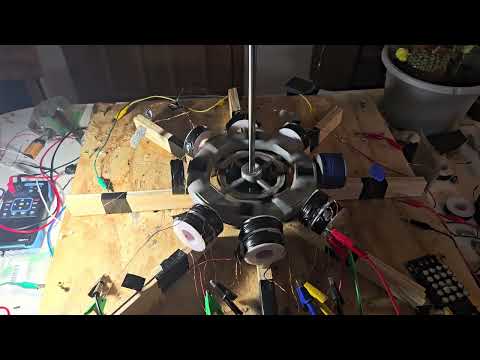 Long-form
M.P.H.'s pulse motor labs EP:2 Skin deep
I fire up two circuits at once, chase meter spikes, and retell the day a three magnet rotor one literally exploded at speed.
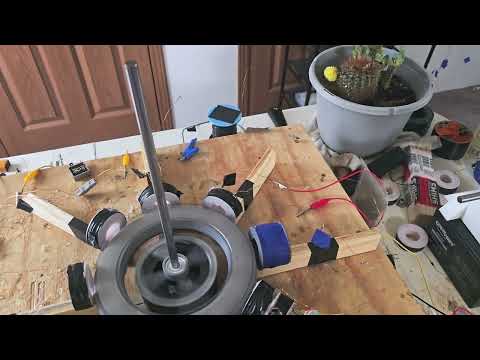 Long-form
Amp Funnel Coil: Pulse Motor Labs EP:1
Eight-magnet eight-coil pulse motor lab — amp funnel coil wiring, pickup coils, and give-and-take battery measurements.
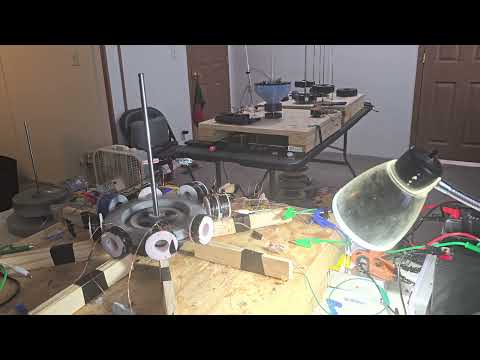 Long-form
8-Magnet Pulse Motor + Induction Coils (Bedini-Style Charge)
Eight-magnet pulse motor at 12V with series induction coils.
One path · free first
Watch free → subscribe → optional membership
Notes stay free. The full experiment lives on YouTube. Membership is optional when you want Discord and exclusives — not required to learn.
- 2
Subscribe free + turn on alerts
Hit Subscribe, then the 🔔 bell so you catch the next experiment.
Subscribe free + 🔔