Experiments·
MPH Pulse Motor Labs EP:2 – Skin Deep
Watch me spin up a three magnet rotor one on the bench. From doing made rotor mistakes that bent a steel shaft to magnet path popped failures, this episode dives into real balance and trigger issues with my pulse motor setup.
Long-form · Full audio · Best on YouTube
Watch the complete video: MPH Pulse Motor Labs EP:2 – Skin Deep
Watch the full long-form video on YouTube — that's where the full bench audio, runtime, and experiments live.
See it on the bench · full runtime on YouTube
What to watch for
- ▸Two independent circuits each with their own 5-oz coil and battery deliver way more torque than expected.
- ▸Shaft shake at high speed comes from an off-center toroidal magnet glued slightly out of middle.
- ▸A past doing made rotor that was too thin let a magnet path popped free, bending the shaft 60 degrees.
- ▸Linking three triggers in series lets the shorter 100-turn trigger coil fire all eight drive coils.
- ▸One two three magnet setup in series worked better than one two for interaction even with only four magnets placed.
- ▸Current objective is minimal trigger length needed to run rather than chasing radiant spikes.
Watch the full long-form video on YouTube — that's where the full bench audio, runtime, and experiments live.
Experiment notes
In this bench session I run two circuits at once on separate batteries and coils, chase spikes on the multimeter, and talk through a scary three magnet rotor one failure from the past that bent a quarter-inch steel shaft at nearly 3000 RPM. Balance, trigger linking, and coil weights all come up while I spin the current eight-magnet rotor by hand and note how little push it needs to start ripping.
Key takeaways
- Two independent circuits each with their own 5-oz coil and battery deliver way more torque than expected.
- Shaft shake at high speed comes from an off-center toroidal magnet glued slightly out of middle.
- A past doing made rotor that was too thin let a magnet path popped free, bending the shaft 60 degrees.
- Linking three triggers in series lets the shorter 100-turn trigger coil fire all eight drive coils.
- One two three magnet setup in series worked better than one two for interaction even with only four magnets placed.
- Current objective is minimal trigger length needed to run rather than chasing radiant spikes.
Short bench session from the Pulse Motor Labs series. I hook both circuits simultaneously, move the meter between coils looking at spikes, and spin the rotor by hand. The eight-magnet rotor needs almost no push to start. I recount a scary older build where a three magnet rotor one flew apart at high speed. Balance is critical; even a slightly off-center toroidal magnet shows up as shaft shake above 2000 RPM. The old rotor was thin with too much magnet space, letting one magnet literally pop out and bend the steel shaft 60 degrees. Good reminder to check glue and zip-tie placement before pushing speeds.
Related on this site
- Pulse Motor Rotor Design: Magnets, Materials and Balance — Directly addresses the balance and magnet placement lessons from the three magnet rotor one failure described in the transcript.
- How to Wind Coils for a Pulse Motor (Step by Step) — The episode compares 100-turn vs 200-turn coils and 16 ga vs 20/30 ga wire weights.
- Can a Pulse Motor Charge Batteries? What Experiments Show — Mention of planning to add the collector extension later to charge batteries.
---
*Generated from video transcript (hash `c6b80a4bc059…`).*
Full transcript
Hey, what's up everybody? This is Michael Page Hatton. In other words, Papa Bear. And I'm coming at you. Um, I think we're going to call it MPH Pulse Motor Labs episode 2. Heck yeah. Okay, so I'm going to be with both of these circuits hooked up, this one and this one. Both of these coils will hit at the same time. Come up the amount of torque Uh, well, let's just be real clear. Um, I charged up the batteries and then I decided to give each circuit its own battery. And each circuit its own coil. And it's it's unbelievably powerful. Well, I mean I believe it, but for two 5-oz coils, man, this thing really rips. Uh, for now I've disman not dismantled, but uh, you know, unhooked the second motor. Uh, we'll probably get into adding the extension off the collector. So then we can charge. But I removed it completely. Uh just starting from scratch, basically. I haven't put it back in yet. >> [snorts] >> Yeah. Okay. Ah. Let's see. >> [snorts] >> I want to move this meter to one of the two coils. So, I'm going to do that real quick. I'll be right back. Okay, we got the multimeter hooked up to this coil. We'll hook it up. We get little spikes on the coil. So, that's interesting. Yeah, that's that's really, really fast. Let's try the other circuit. >> So that's this one. Now you can imagine if I clip both of these at the same time, right? I'm not going to tease you. Haha. But I am kind of I'm going to probably start from ground zero or something closer to that. Put that clip there for now. It doesn't take barely anything to get it going. Let's see. One of these This meter is hooked up to one of the batteries. 12.78 It's this battery. I think I should get this out of the way. I'll just put it right there. All right. >> Yeah, that That sounded like it could get out of hand real fast. You know, even though I like the rotor so much, I feel like it's uh at really, you know, fast paces it uh Well, all I need to say is is the shaft shakes. So, it's not perfectly balanced. I think it might be the toroidal magnet in the middle might be a little off. It kind of looks off. See, I glued it and then I put the zip ties on it afterwards. And I think I missed that one by a little bit. And it it glued into a position that was not in the middle. I mean, it's really close. But at like 2,000 RPMs, you're going to notice close. I mean, I guess there's a a certain speed above and beyond that that it'll all level out. But, yeah, man, I don't want to take the risk. I've had one of these things um back when I you know just started you know, using CAD and stuff like that. Didn't really know what I was doing. I made a rotor uh that was a little thin. I had a little bit too much space for the magnets. So, when it got going almost 3,000 RPMs all the magnet had to do was you know, move a little tiny bit. And with that extra space in there, I'm sure there was some added forces that you know, didn't need to be there. Uh well, the magnet popped out literally and just broke out and it broke out of the PLA. And everything else went the other way. The rotor the shaft which bent at a 60° angle. It was only a quarter-inch shaft, but still, man, steel quarter-inch shaft bent. So, it was a three-magnet rotor. One magnet path popped out and everything else went 180 the other way. I'm like there's physics right there. You know? Really cool. This is awesome. This setup right here with the with the eight magnet rotor and the eight coils. See, I can put another four magnets in here. But, I don't need to. See? Move They all interact. All the magnets could be used. Even Even though I'm all the electromagnets is what I mean, cuz even though there's only four magnets in here, uh I had a a one two three setup, and it worked better than the one two setup. Not the way it is now, but in series. I had I think one two in series, and that worked pretty well. Especially with the four, cuz I'm going to reach this right there, and the magnet's there, and the magnet's here. Awesome, right? But, what I didn't get was when I had all three, and this one would hit like this. I guess it's like a double hit. Um because this one would hit, and then the two would hit. Cuz the trigger is in all three of them. I linked the trigger in series between the coils in order, so it's been working. Awesome. You know, all I got to do is go like that. And I know that seems like a lot, And it probably is a lot based on everything that's going on there. But it's it's a lot less than I'm used to doing. Like how hard I'm pushing it right there. Spinning it. Usually I'd have to go like this. Spin it like that. Just to get it going. See if I linked all eight drive coils together and then had only one trigger in the main coil, it wouldn't work. Not at all. But if I have like three triggers linked in series and then the rest of them are hooked up, that would probably work. It all depends on what your objective is. And this this right now our objective is not, you know, radiant spikes. It's just um in that instance with the triggers, is it how how long does our trigger have to be minimally to get it to run? Cuz I know I know this 5 oz coil right here, it it's half the length of the one next to it because it's 16 gauge. It weighs a little bit more. It's like 5.5 oz, but it's only 100 turns instead of 200 turns. So that trigger is not going to fire off all eight of these coils. And they're in series, so it just won't fire at all. But you link the the triggers in series, so it makes it longer. So it makes it It's awesome. But right now, uh I've got one 20-gauge and 30-gauge coil and one 20-gauge and 30-gauge coil. So the 20-gauges link is it's all parallel. Anyway, I I love having fun like this, throwing myself a little bit. You know, you get you get kind of like a a PTSD notion. I don't want to you know, like shade or anything. I don't It never stopped me, you know, to have accidents happen. Uh it never really, you know, got in my way. It changed the way I built stuff. Yeah, it changed the way I did my my engineering. So cool. So let's take a look real quick at what we got here. We got a transistor and a light. And then we got our connections to the coil and the power supply on both circuits. And that's it, currently. Um this will be our B out. So, we put this in the collector slot. And then we clip that to the positive end of the battery charge battery. But, as you can see, I have removed both of them. Just want to get to the raw basics, you know. And I don't I don't want to sound like uh rude or anything, but I haven't gotten one charge. And it's probably because I have 5-oz coils to stay. Um I would bet that it's because I have 5-oz coils. All It all reverts back to what it was when I started charging. At least I haven't damaged the battery, as far as I'm concerned. Um as long as I haven't damaged the battery, I could still use it. And I think that's awesome. But, yeah, uh that's the god's honest truth. I can get it it to go up real fast, real high. Um but it never stays. It never stays. But, you know, I could probably roll a fatter coil. See if we can get it to stay. But, uh yeah, I don't I don't want to diss on the little coils, man, because they Um they don't have the charge aspect, I don't think, but they they they got everything else. So cool. Uh they're not cheap to run, I don't think. Uh not the 20-gauge and the 16-gauge coils are not cheap. But, uh thank you very much. Peace out. Have a wonderful night. Bye now.
Keep watching · longer sessions
More long-form bench runs
Queue up the next long-form bench run on YouTube — longer sessions keep the workshop free for everyone.
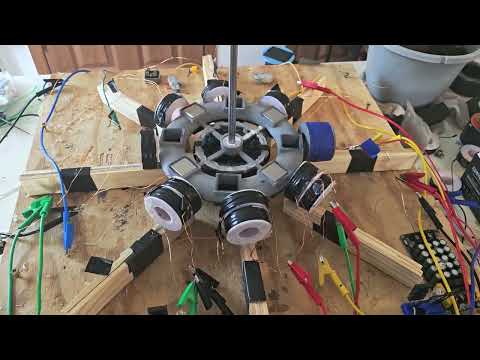 Long-form
2 circuits running a third room still for some growth/expansion.
Papa Bale here with a messy bench update.
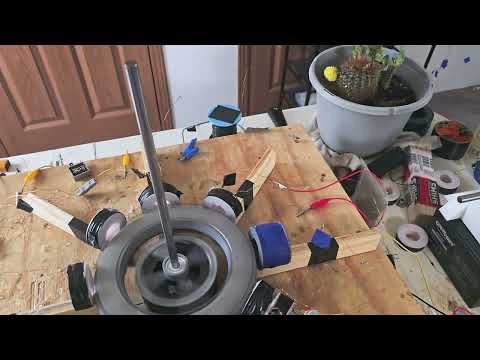 Long-form
Amp Funnel Coil: Pulse Motor Labs EP:1
Eight-magnet eight-coil pulse motor lab — amp funnel coil wiring, pickup coils, and give-and-take battery measurements.
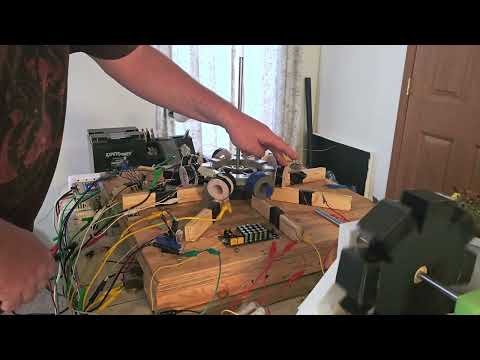 Long-form
MPH pulse motor lab
Real bench time with motor rotor magnets on a pulse motor rotor.
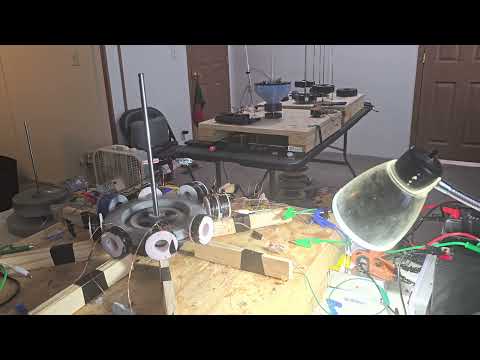 Long-form
8-Magnet Pulse Motor + Induction Coils (Bedini-Style Charge)
Eight-magnet pulse motor at 12V with series induction coils.
One path · free first
Watch free → subscribe → optional membership
Notes stay free. The full experiment lives on YouTube. The $2.99 Member tier is optional (loyalty badges, emoji, members-only live chats, priority replies, members-only videos, shout-outs) — not required to learn.
- 2
Subscribe free + turn on alerts
Hit Subscribe, then the 🔔 bell so you catch the next experiment.
Subscribe free + 🔔