Experiments·
Papa's Pulse Motor Gets a Transistor Upgrade Sensor Coil and Hits 700 RPMs
Watch me upgrade my pulse motor with a transistor upgrade sensor coil, 3-coil series wiring, and a 4-magnet rotor that reaches 700 RPMs. From bench tests to how the sensor coil acts like a Hall effect, see exactly what worked at 9V and 25V.
Long-form · Full audio · Best on YouTube
Watch the complete video: Papa's Pulse Motor Gets a Transistor Upgrade Sensor Coil and Hits 700 RPMs
Watch the full long-form video on YouTube — that's where the full bench audio, runtime, and experiments live.
See it on the bench · full runtime on YouTube
What to watch for
- ▸The external sensor coil works like a virtual Hall effect sensor and eliminates trigger noise.
- ▸Three coils wired in series (20ga + two 16ga) feed the transistor collector while the sensor coil drives the base.
- ▸At 9V the motor runs smoothly and quietly; at 25V amps climb and the transistor loses control around 700-800 RPM.
- ▸Grounding is required for the circuit to work with this transistor setup.
- ▸The 4-magnet rotor on PLA printed hub shows some grip from magnetic flux but still spins well.
- ▸Transistor test at 5V shows stable operation with no bouncing.
Watch the full long-form video on YouTube — that's where the full bench audio, runtime, and experiments live.
Experiment notes
I swapped in a transistor upgrade sensor coil on my 4-magnet rotor pulse motor with 3 coils in series. It runs super quiet at 9 volts, hits around 700-800 RPMs, and the sensor coil replaces the trigger without any clicking noise. We pushed it to 25V before the transistor started losing grip.
Key takeaways
- The external sensor coil works like a virtual Hall effect sensor and eliminates trigger noise.
- Three coils wired in series (20ga + two 16ga) feed the transistor collector while the sensor coil drives the base.
- At 9V the motor runs smoothly and quietly; at 25V amps climb and the transistor loses control around 700-800 RPM.
- Grounding is required for the circuit to work with this transistor setup.
- The 4-magnet rotor on PLA printed hub shows some grip from magnetic flux but still spins well.
- Transistor test at 5V shows stable operation with no bouncing.
I finally got the transistor upgrade sensor coil working cleanly on this 4-magnet rotor pulse motor. No more reed switches for now — this thing is quiet and simple.
Bench notes: 4-magnet rotor, one timing/sensor coil plus three drive coils (20ga, 16ga, 16ga) in series. Runs at 9V steady, reached ~700 RPMs before I backed off. At 25V the current climbed and the transistor started to lose its grip. Sensor coil replaces the usual trigger and pulses the base silently.
The wiring is straightforward: power in, through the three series coils to the collector, sensor coil to base + ground, emitter to ground. I left off any SG-style diodes or lights this time.
Related on this site
- Which Transistor for Your Pulse Motor? (2N3055, TIP31, and More) — Directly supports the transistor upgrade and testing steps shown in the video
- Pulse Motor Rotor Design: Magnets, Materials and Balance — Covers the 4-magnet rotor, PLA grip issues, and aluminum alternative mentioned
- Using a Hall Effect Sensor in Your Pulse Motor Build — The sensor coil is described as virtually working like a Hall effect sensor
- How to Maximize RPM on Your Pulse Motor — Video targets 700 RPMs and shows voltage vs speed behavior
- How to Wind Coils for a Pulse Motor (Step by Step) — Explains the 20ga and 16ga coils used in the series arrangement
---
*Generated from video transcript (hash `59d6e891be7b…`).*
Full transcript
hello ladies and gentlemen what's up it's Papa Bale welcome to the channel we're looking at a four magnet rotor here on a four coil spread um one coil is Bing there it is a trigger coil for the rest of the setup it's really just a timer coil don't need to trigger anything we're not generating any electricity or trying to for that matter this is just to spin well I'm this is just going to spin and I'm going to turn it up to 9 volts and I'm going to give it a whack see that's that's good that's that's working we got a 20 gauge 16 gauge and another 16 gauge uh and then the timing coil and these are oriented in the direction that it's spinning so uh I believe that is counterclockwise see how that works um I'm I'm liable to try it both ways though with the orientation the way it is and headstrong I'm going to try both because I'm I'm I'm pretty sure that although this this works it doesn't work better um it might be pretty close you know I don't know exactly what's going to happen I will try both of those I think they're sweet so it's like the mirror image one that I did a while back back where they went like this and then the mirror image came like this uh like a zigzag this is nice though having the transistor work the way it's working been struggling with them all day this is good even if it's not going tremendously fast we're probably going to get around 800 RPMs yep there is 800 we need to get 36 uh 700 700 RPMs my fault we are still early in the game here all right we are at Max Q here 25 volts in oh there it goes it no it's not going to work yeah the amp started revving up pretty high and shut it down because that's not right that's the transistor losing its grip but yeah that's it's pretty good so we're going to check the transistor real fast this is how I do it turn up to five it's not bouncing back and forth it's it's good it's good it's working at five 5.38 we leave it like that see how fast we can get it going oh wow man I'm it's so quiet too I mean just it's so quiet yeah so um notice how there's no trigger it's not making any noise it hasn't been triggered what it is is it is pulsing with the external um sensor coil we'll call it a sensor coil because that's what it's doing the virtually working as a hall effect sensor this 9 volts we might have blown a transistor like halfway but it might be good that's good that's pretty good we're going to leave it said that already but now we're really just going to leave it because 9 volts is what I usually put it in on it's just fired up at so if we can follow the diagram here the power comes in this black one right here and power comes in this black clip and it goes up into the coil and out of the coil into this yellow clip into this coil into the red clip into that coil Into the Blue clip and The transistor's Collector and then this coil is hooked to the base of the transistor and grounded as well won't work if you don't ground it for some reason maybe if I did it like an AC version I wouldn't have to ground it but we're just going to work it's working so we're good we don't need to change it that that's the truth man we don't need to change it um and then the emitter so when the base is triggered by this coil it'll open up the gate basically and then the collector and the emitter will be connected and the energy will flow down the emitter into the ground and back to the power supply and that's pretty much it that's the whole thing that's it now I could hook up some more like uh SG style stuff with dodes and uh Lights I've got some of that stuff just lying around here but honestly I'm not going to hook up anything else right now so I don't need to do that and I I'm not sure exactly I mean I have a couple models of rotors kind of like this one for the utron to be in but uh yeah man they GP there's too much grip it's like a a ball of some kind the PLA and it grips because there's too much plastic in it it's only infused pla I don't think it was ever meant to uh except or maybe the core Factor because there is a magnetic flux involved with the iron pla um if anybody could print out like I mean I might just do it myself but I don't want to um make something that's going to if it does work blow something up I just want to print like a wire shaped print and see if we can get uh conductivity I'm just thinking because it's mixed with a you know edible plastic or recyclable recyclable plastic that um that's going to impede Ser really badly uh its ability to conduct I'm not saying it can't and we'll test it out I am saying that it is kind of like got a rubber if rubber feel to it when you're trying to spin it on something it's rubbery it's got a grip to it so that's not it's just not going to work I got a 100% [Music] aluminum uh one of these things made and that it's a lot smoother doesn't feel as rubbery it might be able to spin anyway I think this is pretty sweet hooking up the transistor to this thing that's great I've been messing around with read switches for the last week or so and I'm you know it's getting kind of boring um I haven't like uh well I'll take suggestions on like whether people want me to you know generate any anything you generator coil quote unquote pickup coil I don't care what it's called dude it all it does let's chill here let the magnets pass it we're going to hook it up to a multimeter and we're going to see how much AC electricity or DC depending if we put a diode on it or not we're generating from that coil and it's interaction with this rotor or any other rotor we choose you know that that'll be an experiment all right well thank you very much peace out have a great night please subscribe bye now
Keep watching · longer sessions
More long-form bench runs
Queue up the next long-form bench run on YouTube — longer sessions keep the workshop free for everyone.
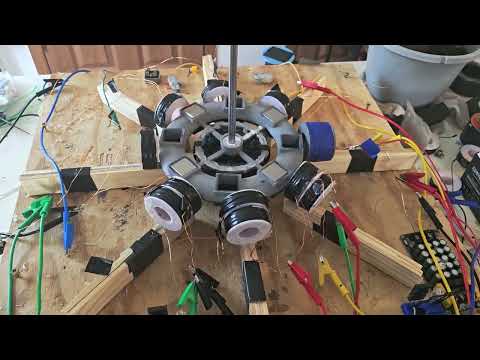 Long-form
2 circuits running a third room still for some growth/expansion.
Papa Bale here with a messy bench update.
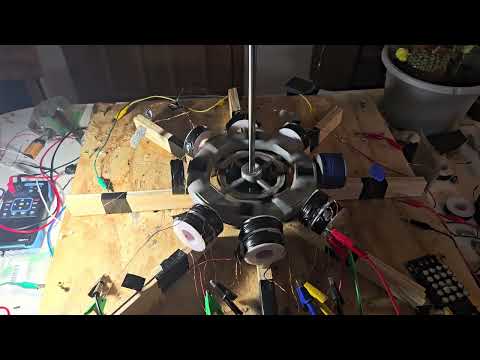 Long-form
M.P.H.'s pulse motor labs EP:2 Skin deep
I fire up two circuits at once, chase meter spikes, and retell the day a three magnet rotor one literally exploded at speed.
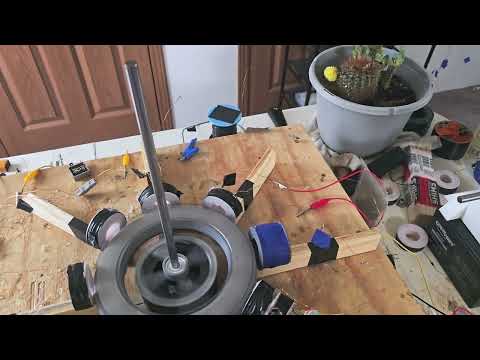 Long-form
Amp Funnel Coil: Pulse Motor Labs EP:1
Eight-magnet eight-coil pulse motor lab — amp funnel coil wiring, pickup coils, and give-and-take battery measurements.
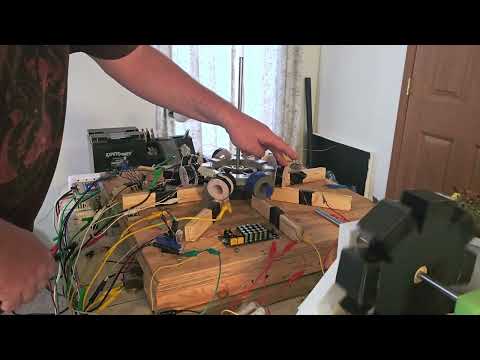 Long-form
MPH pulse motor lab
Real bench time with motor rotor magnets on a pulse motor rotor.
One path · free first
Watch free → subscribe → optional membership
Notes stay free. The full experiment lives on YouTube. Membership is optional when you want Discord and exclusives — not required to learn.
- 2
Subscribe free + turn on alerts
Hit Subscribe, then the 🔔 bell so you catch the next experiment.
Subscribe free + 🔔